
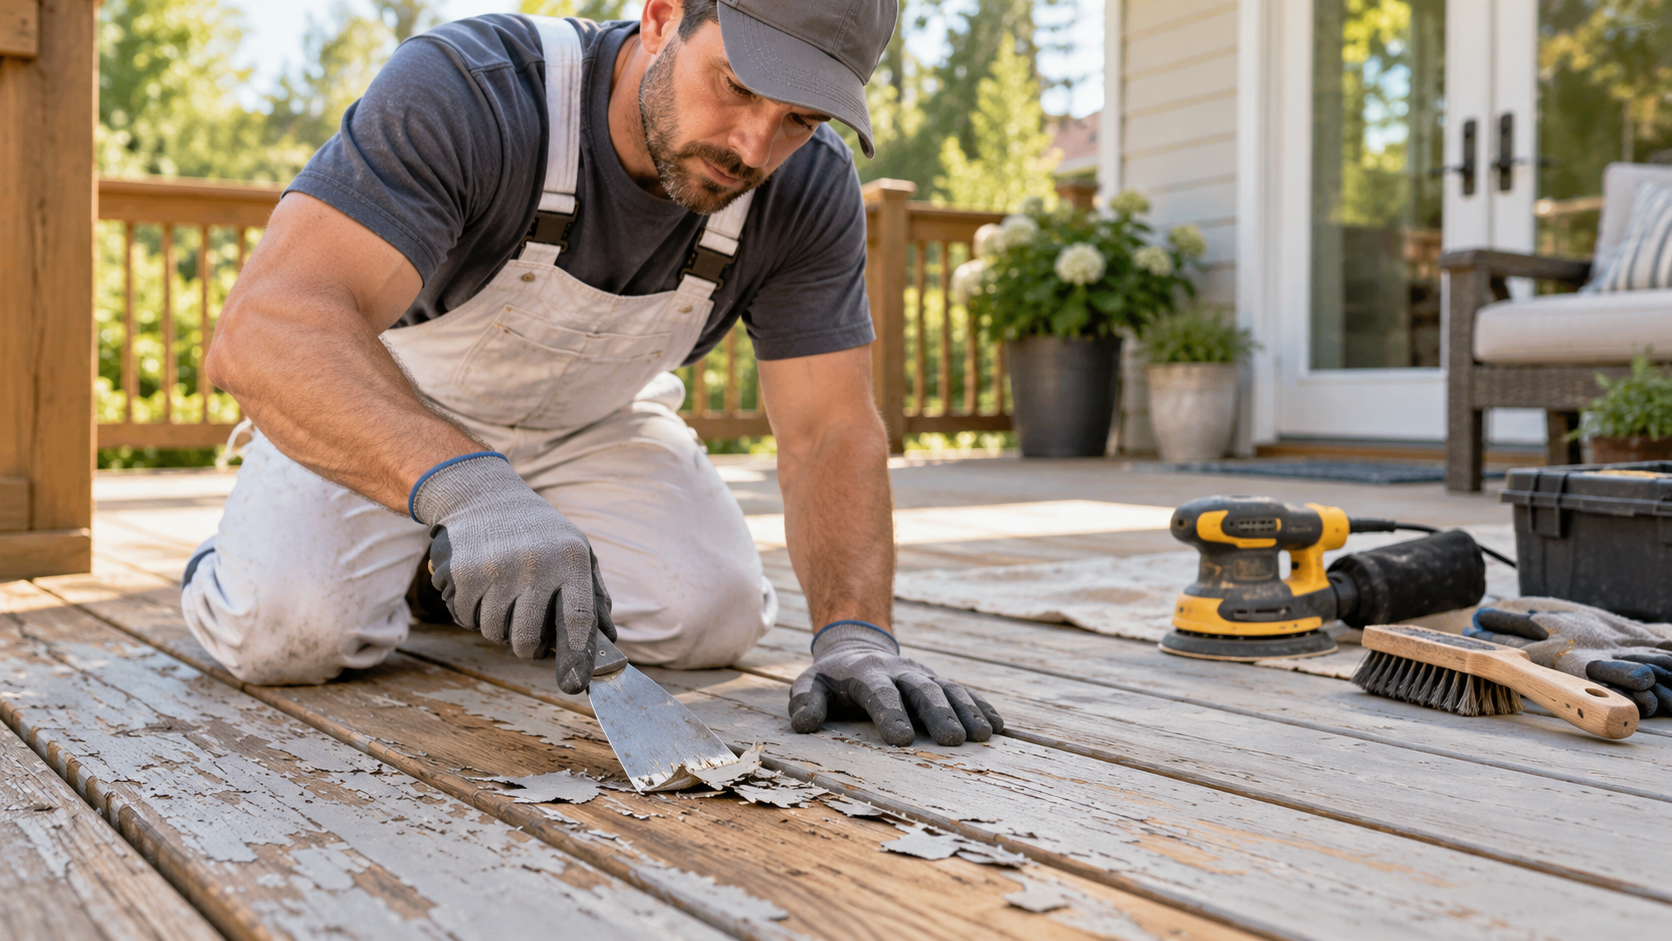
A painted wood deck can look great for years, but eventually exposure to sunlight, rain, humidity, foot traffic, and temperature changes can cause the coating to crack, peel, or lose adhesion. Once this happens, simply adding another coat of paint is rarely the best solution. The unstable finish underneath can prevent new paint or stain from bonding properly.
Learning how to get paint off wood deck surfaces correctly is therefore less about removing paint as quickly as possible and more about protecting the wood while creating a sound surface for the next finish.
Depending on the condition of your deck, you may need scraping, a deck-safe paint stripper, careful washing, sanding, or a combination of these methods. The important part is choosing the least aggressive method that will remove the failed coating without gouging, splintering, or unnecessarily thinning the boards.
Start by Figuring Out What Condition the Deck Is In
Before reaching for a pressure washer or sander, inspect the entire deck.
The best paint-removal method depends heavily on how the existing finish is failing. A deck with a few peeling patches should not necessarily be treated the same way as one covered with several deteriorating layers of paint.
Look closely for:
- Peeling or curling paint
- Hairline cracks in the coating
- Bare wood showing through high-traffic areas
- Thick layers from repeated repainting
- Soft, cracked, or rotten boards
- Raised nails or screws
- Mold, mildew, or algae growth
- Splintered or heavily weathered wood
- Areas where paint remains firmly attached
This inspection can save considerable work. If most of the coating is still tightly bonded and you intend to repaint the deck with a compatible product, complete removal to bare wood may not always be necessary.
However, if you plan to switch from an opaque paint to a semi-transparent stain, considerably more of the previous coating will need to be removed because stain must penetrate the wood rather than simply cover it.
Check the Age of the Existing Paint Before Disturbing It
Safety should come before surface preparation.
If there is a possibility that an older deck or covered porch contains very old paint, avoid immediately sanding, grinding, or heating the surface. Paint on older properties may contain lead.
If lead is suspected, have the coating properly tested and follow applicable lead-safe procedures. Professional assistance may be appropriate when significant amounts of older painted material need to be disturbed.
For ordinary modern deck coatings, you should still use suitable protection, including:
- Safety glasses
- Chemical-resistant gloves when using stripper
- Long sleeves and closed footwear
- Hearing protection around power equipment
- A suitable dust mask or respirator when sanding
Protect landscaping, siding, doors, concrete, and other surfaces near the deck before beginning.
How to Get Paint Off Wood Deck: Choose the Right Removal Strategy
There is no single tool that works best for every deck.
In many cases, the safest strategy is to work from the least aggressive technique to the most aggressive one:
- Remove loose paint manually.
- Soften stubborn coatings with an appropriate stripper if necessary.
- Scrub or carefully rinse away loosened material.
- Allow the wood to dry.
- Sand remaining paint and raised fibers.
- Repair and prepare the surface for refinishing.
This approach reduces unnecessary wear on the deck boards.
Scraping Works Best on Loose and Peeling Paint
Manual scraping is a good starting point because it gives you excellent control.
Use a sharp paint scraper or putty knife to remove coating that is already lifting away from the wood. Work with the grain where possible and avoid digging the corners of the scraper into the boards.
The goal is not to force off paint that is still strongly bonded. Concentrate first on:
- Flaking edges
- Bubbling areas
- Loose paint around fasteners
- Paint separating along board joints
- Peeling areas near stairs and railings
Scraping may seem slow, but it helps you understand how firmly the remaining coating is attached before moving to stronger removal methods.
When a Deck Paint Stripper Makes Sense
Chemical stripping can be especially useful when a deck has multiple layers of paint or large sections that remain too firmly bonded for easy scraping.
Products designed specifically for exterior wood decks are usually preferable to general-purpose furniture strippers because the application area, cleanup process, and surrounding environment are very different.
Apply the product according to its instructions. Some products are brushed or rolled onto the deck, while others may be applied using an appropriate sprayer.
Work in Manageable Sections
Avoid coating the entire deck with stripper at once.
Smaller sections give you better control over dwell time and prevent the product from drying before you can remove the softened finish.
An effective workflow is:
- Apply stripper to a manageable area.
- Allow the recommended dwell time.
- Test a small section with a scraper.
- Allow additional dwell time if the paint is not releasing.
- Scrape away softened material.
- Scrub stubborn residue with a stiff nylon brush.
- Move to the next section.
Do not assume leaving a stripper on much longer than recommended will automatically improve results. Always follow the product instructions.
Be Careful When Using a Pressure Washer
One of the biggest mistakes homeowners make while researching how to get paint off wood deck surfaces is assuming that maximum water pressure equals maximum cleaning power.
A pressure washer can help remove loosened paint and rinse residue, but excessive pressure can damage wood surprisingly quickly.
Too much pressure may:
- Cut grooves into soft deck boards
- Raise and shred wood fibers
- Create uneven surface texture
- Damage board edges
- Drive water deeply into cracks and joints
- Make later sanding more difficult
Start conservatively and test an inconspicuous area.
Keep the nozzle moving instead of concentrating the stream in one spot. Maintain a reasonable distance from the surface and use a wider fan pattern rather than a highly concentrated jet.
The pressure washer should assist paint removal—not carve the paint away by force.
Why Sanding Should Usually Come Later
Trying to sand away thick layers of deck paint from the beginning can consume large quantities of sandpaper and produce considerable dust.
Sanding becomes much more useful after scraping, stripping, and cleaning have removed most of the coating.
At that stage, sanding can:
- Remove small remaining patches of paint
- Smooth transitions between painted and bare areas
- Knock down raised wood fibers
- Reduce minor surface roughness
- Prepare the deck for a new finish
An orbital sander works well across open deck boards, while a detail sander may make corners, stairs, and railing components easier to handle.
Avoid aggressively sanding one location until it becomes noticeably lower than the surrounding wood.
Do Not Make the Deck Too Smooth
Deck boards do not normally need furniture-level sanding.
Extremely fine sanding can close the wood surface and may affect the way certain penetrating finishes are absorbed.
Your objective is a clean, reasonably uniform surface that matches the preparation requirements of the coating you plan to apply next.
Always check the finish manufacturer’s instructions before deciding on your final sanding grit.
Clean Away Chemical and Sanding Residue
Getting the paint off is only part of the job.
Residual stripper, sanding dust, loose wood fibers, dirt, and old coating particles can interfere with adhesion if they remain on the deck.
After removal:
- Follow the stripper manufacturer’s cleanup instructions.
- Rinse the surface thoroughly when required.
- Use a cleaner or neutralizer if the product calls for one.
- Remove paint debris rather than washing it into nearby soil or drains.
- Vacuum or sweep away sanding dust.
- Keep debris out of gaps between deck boards.
Some stripping products can temporarily darken wood. Depending on the system you are using, a compatible wood brightener or neutralizer may help restore a more natural appearance while preparing the surface for refinishing.
Let the Wood Dry Before Deciding What Comes Next
One of the easiest ways to compromise a deck refinishing project is applying a coating to wood that is still holding too much moisture.
Rainfall, humidity, shade, temperature, deck construction, and the amount of water used during cleaning can all affect drying time.
Instead of relying only on a fixed number of hours, follow the requirements of the paint or stain you intend to use. When moisture limits are specified by the coating manufacturer, those limits should guide your decision.
Pay special attention to:
- Shaded portions of the deck
- Areas close to the house
- Board ends
- Stairs
- Gaps where water drains slowly
- Decks surrounded by dense landscaping
These areas can remain damp longer than exposed boards.
Inspect the Bare Deck Before Refinishing
Paint removal frequently exposes problems that were previously hidden.
Once the deck is clean and dry, conduct another inspection.
Look for Structural and Surface Problems
Check for:
- Soft or rotting wood
- Deep splits
- Loose railings
- Protruding fasteners
- Damaged stair components
- Severely cupped boards
- Deep pressure-washer marks
- Areas requiring additional sanding
- Boards that should be replaced rather than repaired
Coating defective wood simply hides the problem temporarily.
If a board has significant structural deterioration, replacement is usually more sensible than trying to disguise it with filler and paint.
Should Every Trace of Paint Be Removed?
Not necessarily.
How much coating must be removed depends largely on what you plan to apply afterward.
If You Are Repainting
Sound existing paint may sometimes remain if it is:
- Firmly bonded
- Properly cleaned
- Compatible with the new coating
- Scuff-sanded as required
Loose and failing edges still need to be removed and feathered smoothly.
If You Are Switching to a Penetrating Stain
Paint removal generally needs to be much more complete.
Semi-transparent and penetrating stains depend on contact with the wood itself. Remaining paint can prevent proper absorption and create patchy differences in appearance.
This is one reason homeowners should decide on the next finish before beginning removal.
Common Mistakes That Can Damage a Wood Deck
Knowing how to get paint off wood deck boards also means knowing what not to do.
Avoid These Paint-Removal Errors
Using excessive pressure
High-pressure washing can permanently scar otherwise usable boards.
Starting with extremely coarse sanding
Overly aggressive abrasives can remove more wood than necessary and leave visible scratches.
Allowing stripper to dry on the deck
Some products become harder to remove if they dry during the dwell period.
Working without a test area
Always test your chosen removal method somewhere inconspicuous before treating the entire deck.
Skipping the rinse or neutralization step
Chemical residue may interfere with the next coating.
Applying a finish too soon
Wood that still contains excess moisture can contribute to coating failure.
Ignoring deteriorated boards
Fresh paint cannot correct structural decay.
Removing sound paint unnecessarily
If the next coating is compatible, removing every firmly bonded trace can add hours of work without improving the finished result.
When Professional Deck Preparation Is Worth Considering
Removing paint from a small deck with limited peeling can be a reasonable DIY project.
The situation changes when you are dealing with a large deck, extensive railings, stairs, multiple paint layers, deteriorated boards, or coatings that are extremely difficult to identify or remove.
Professional preparation may also be valuable when:
- The deck has been painted repeatedly.
- Large portions of paint are failing.
- Wood damage is visible underneath.
- The deck requires repairs before refinishing.
- You want to change from paint to a more revealing finish.
- Previous refinishing attempts have failed.
- You are concerned about damaging expensive deck boards.
- Older coatings create possible lead-safety concerns.
Experienced painters can evaluate whether complete stripping is actually necessary and select preparation methods based on the wood, coating condition, and new finish being applied.
How to Make the New Deck Finish Last Longer
Once all that preparation work is complete, protect the investment.
Inspect painted or stained decks periodically instead of waiting until widespread peeling appears.
Good maintenance includes:
- Sweeping leaves and organic debris away regularly
- Keeping drainage gaps between boards clear
- Cleaning dirt before heavy buildup occurs
- Moving planters occasionally so moisture is not trapped underneath
- Using furniture pads where appropriate
- Addressing small coating failures early
- Checking high-traffic areas for premature wear
- Maintaining exposed board ends and stairs
Deck coatings tend to fail gradually. Catching a small problem early is much easier than stripping an entire deck again several years later.
Final Thoughts on Removing Paint From a Wood Deck
The best way to approach how to get paint off wood deck surfaces is not to choose the strongest tool available. Start by understanding why the coating failed, determine how firmly it is attached, and remove only as aggressively as the condition requires. Scraping, deck-safe stripping products, controlled washing, and careful sanding can work together to expose a stable surface without unnecessarily damaging the boards. Just as importantly, allow adequate drying time, repair deteriorated wood, and prepare the deck according to the requirements of the finish you intend to apply next. If the project is part of a larger exterior restoration or you want professional preparation and finishing rather than taking on the stripping process yourself, experienced exterior painters charlotte nc can help evaluate the existing coating, prepare the wood properly, and create a more durable finished surface.