
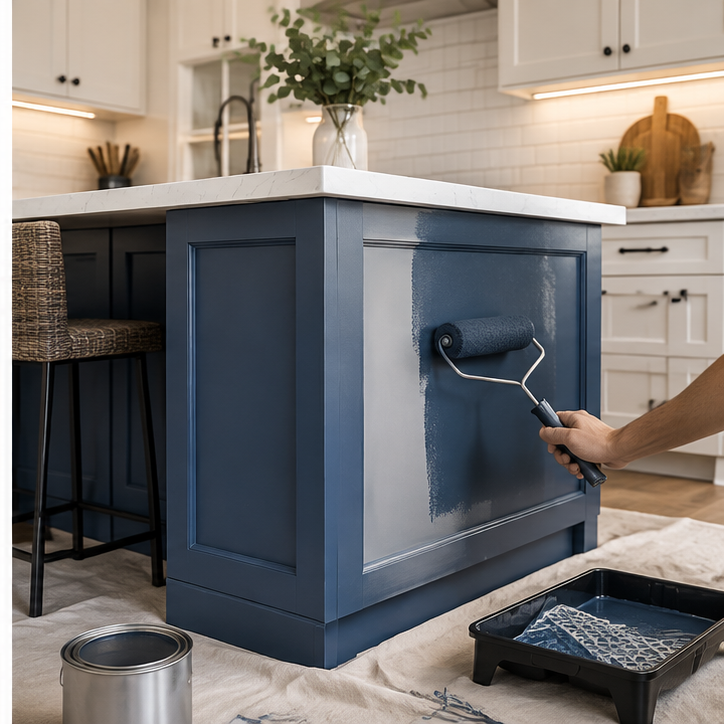
Learning how to paint kitchen island cabinetry correctly can transform the entire kitchen without replacing the island itself. Because the island often sits in the center of the room, changing its color can introduce contrast, connect surrounding finishes, or give an otherwise neutral kitchen a stronger focal point.
However, an island is also one of the hardest-working painted surfaces in the home. Hands touch it, stools bump into it, shoes scuff the toe kick, and cooking residue gradually collects on the finish. That means surface preparation and coating selection are much more important than they would be for an ordinary wall.
Decide Whether the Island Is a Good Candidate for Painting
Before choosing a color, inspect the existing finish and material.
Painting works best when the cabinet structure is sound.
Look for:
- Loose or peeling coatings
- Grease buildup
- Damaged veneer
- Deep scratches
- Swollen material
- Cracked joints
- Water damage
- Loose doors or hardware
Painting will improve appearance, but it will not repair structurally damaged cabinetry.
If the existing cabinets need more extensive restoration, our guide explaining cabinet refinishing can help you understand the difference between painting and a more complete refinishing process.
Choose the Island Color in Context
A kitchen island does not have to match the surrounding cabinets.
In fact, Sherwin-Williams specifically highlights kitchen islands as an opportunity to introduce a contrasting cabinet color.
Before selecting the color, compare samples with:
- Perimeter cabinets
- Countertops
- Backsplash
- Flooring
- Wall color
- Hardware
- Nearby furniture
A paint chip viewed by itself may look completely different once surrounded by warm wood, cool stone, or artificial lighting.
Test samples on or near the island and view them at different times of day.
Remove Doors, Drawers, and Hardware
If the island includes cabinet doors or drawers, remove them where practical.
Label everything before taking it apart.
A small piece of painter’s tape inside each door and cabinet opening can help ensure pieces return to the correct locations.
Remove knobs, pulls, and hinges rather than painting around them.
Sherwin-Williams recommends removing doors and hardware before cabinet painting because doing so improves access and avoids paint buildup around functional components.
Clean the Island Thoroughly
This is one of the most important steps in how to paint kitchen island cabinetry.
Kitchen surfaces accumulate oils even when they do not look dirty.
Clean the doors, drawer fronts, panels, legs, toe kicks, and frame with an appropriate degreasing cleaner.
Pay extra attention around:
- Handles
- Drawer pulls
- Trash cabinets
- Seating areas
- Cooking surfaces
Sherwin-Williams recommends degreasing kitchen cabinets before priming or painting because oils can interfere with adhesion.
Allow everything to dry thoroughly.
Protect the Countertop and Floor
Cover nearby flooring and counters carefully.
Mask around the countertop edge if the base of the island is being painted while the counter remains installed.
Also protect outlets, appliances, plumbing fixtures, and decorative hardware that cannot be removed.
Sand or Degloss the Existing Finish
The objective is not always to remove the old coating.
Instead, you need a surface that is clean, sound, and receptive to the new coating system.
Light sanding can:
- Reduce gloss
- Smooth imperfections
- Feather chips
- Improve uniformity
- Prepare repaired areas
Some modern bonding primers may reduce sanding requirements on certain clean, paintable surfaces, but product instructions and adhesion testing should guide that decision. Sherwin-Williams recommends testing adhesion before proceeding with an entire cabinet project.
Remove all sanding dust afterward.
Repair Surface Defects
Fill unwanted hardware holes, dents, cracks, or minor damage with a compatible filler.
Let repairs dry and sand them smooth.
If you are changing hardware, confirm the new hole spacing before filling the old holes.
Prime the Kitchen Island
Primer can play an important role on slick cabinetry, bare wood, repaired areas, and significant color changes.
Use a bonding or cabinet-appropriate primer recommended for the existing material and topcoat.
Apply a smooth coat and allow it to dry fully.
If the primer dries with rough fibers or small imperfections, lightly sanding before the finish coat can improve the final appearance.
How to Paint Kitchen Island for a Smooth Finish
Once preparation is complete, apply a durable coating intended for cabinets or trim rather than ordinary wall paint.
Cabinet enamels are formulated to produce a harder, smoother finish suitable for frequently handled surfaces. Sherwin-Williams recommends durable urethane trim enamel for cabinet applications, while Benjamin Moore similarly highlights cabinet-specific waterborne coatings for smooth, furniture-like finishes.
Brush Detailed Areas First
Use an angled brush on:
- Recessed panels
- Corners
- Decorative molding
- Tight edges
Keep coats thin.
Roll Broad Flat Sections
A suitable small roller can help produce a consistent finish across side panels, door faces, and larger flat areas.
Work quickly enough to blend brush and roller areas before the paint begins setting.
Apply the Second Coat Only When Ready
Do not rush recoating.
Follow the manufacturer’s required recoat time.
Cabinet coatings may feel dry on the surface well before they have developed full hardness.
Sherwin-Williams’ current cabinet guidance recommends allowing significant drying time between coats and before reinstalling hardware.
A second thin coat generally looks better than trying to obtain full coverage with one heavy application.
Give the Finish Time to Cure
This is one of the most overlooked parts of how to paint kitchen island projects.
Dry and cured are not the same thing.
Even after doors can be handled, the finish may still be developing hardness.
For the first several days:
- Avoid aggressive cleaning
- Prevent stools from striking panels
- Keep wet towels away
- Treat doors and drawers gently
Follow the product’s stated curing guidance before returning the island to heavy use.
A Kitchen Island Deserves Cabinet-Level Preparation
The best way to approach how to paint kitchen island cabinetry is to treat the island like furniture rather than a wall. Clean away grease, repair defects, prepare the existing finish for adhesion, use an appropriate primer, and apply thin coats of a durable cabinet-grade enamel. Careful preparation is what turns a simple color change into a smooth, long-lasting centerpiece. If you want the island finish to coordinate professionally with surrounding cabinetry, countertops, walls, and trim, experienced kitchen cabinet painting charlotte nc specialists can prepare and refinish the surfaces with a durable, consistent coating system.